How to Set Up and Manage Your Business On Google
Sep 30, 2020If you are completely new to the concept of Google My Business or haven’t yet ‘claimed’ your business on Google, then this article is for you.
Google My Business is a free tool that allows you, the business owner, to promote your business and website in Google Search results. It is location-based, so a physical address is essential, although you aren’t required to list your full address publicly. Here is a snapshot of what ours looks like:
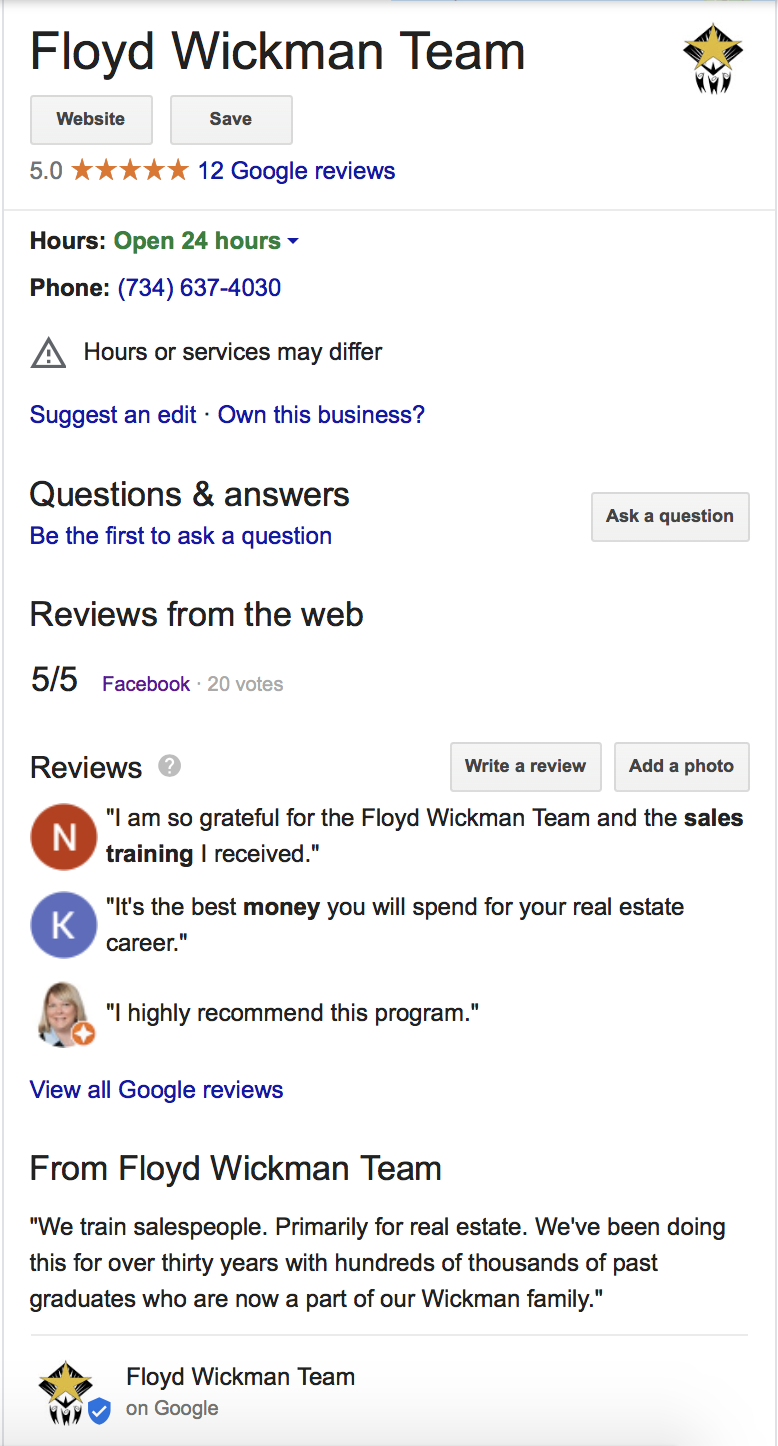
When you are searching for somewhere to eat, or for the closest clothing store, these results are what appear on Google Maps or on the right-hand side of your Google Search. If you have a physical address and social media pages created, your Google Business exists whether or not you’ve claimed it.
Let’s change that today. You want to be in control of what people are reading about your business.
The first step is to make sure you verify or claim your business with the email account you want to manage it with. Use an email address that you will have long-term. Use this quick step-by-step to claim or add your business to Google: https://support.google.com/business/answer/2911778?co=GENIE.Platform%3DAndroid&hl=en-GB
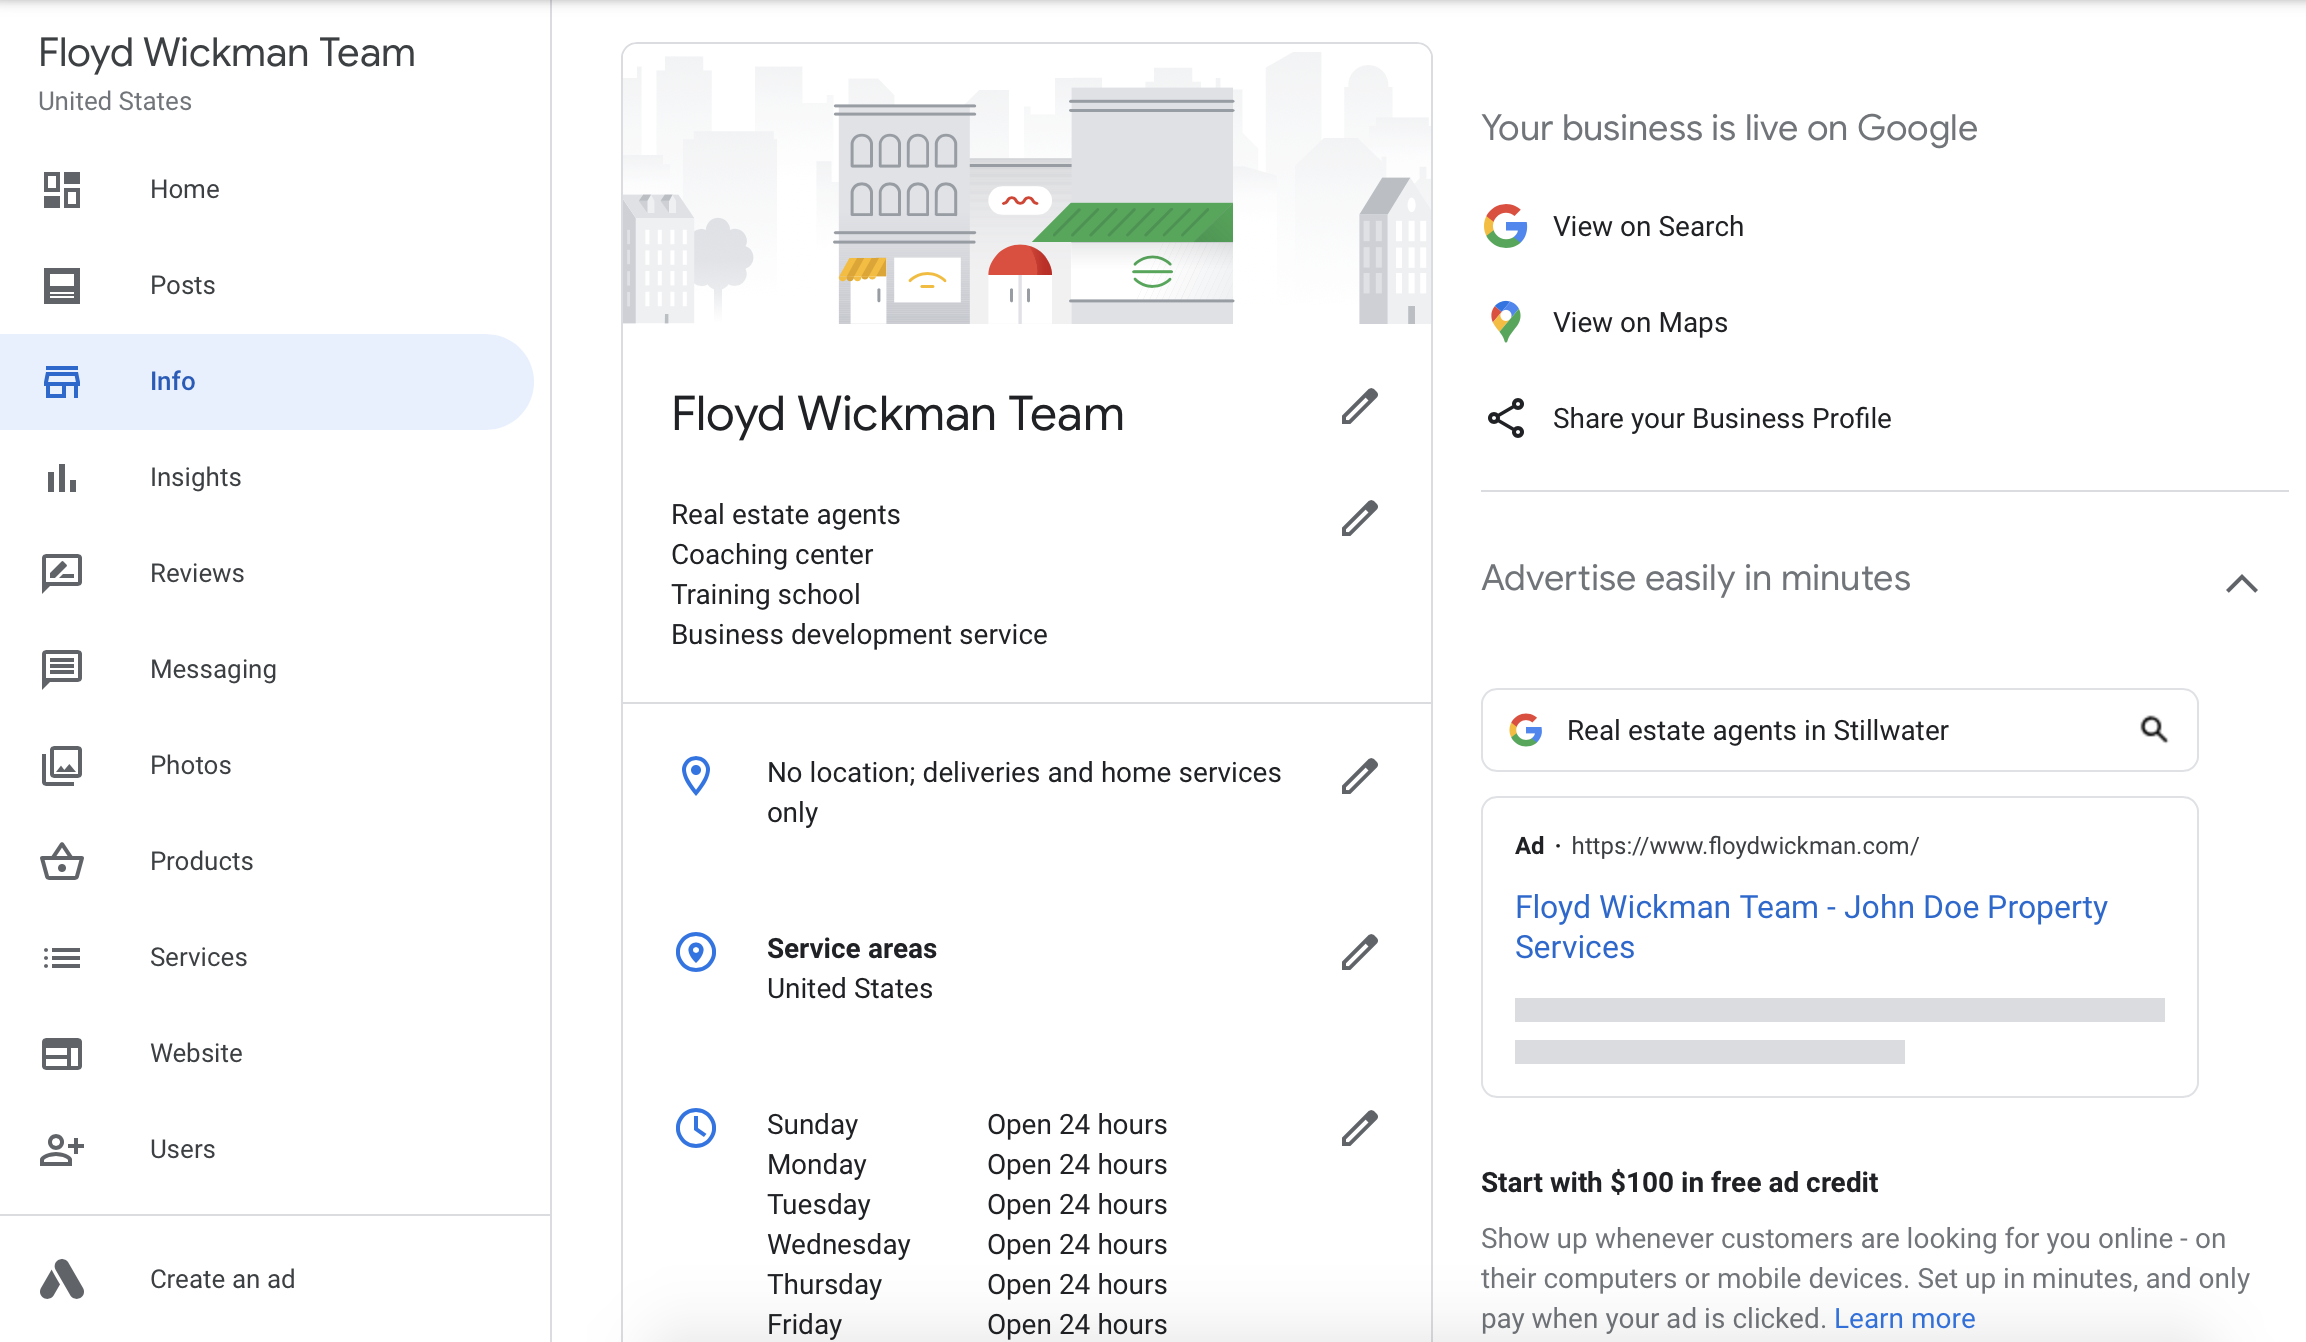
Once your Google Business is established and claimed, you can start customizing the details shown in the listing. Let’s focus on a few key sections:
1. Info Tab: this is where you will make sure key elements of your listing are up to date including your name, categories, service areas, hours, address, phone number and website. Work through this section until it is filled in and current.
2. Photos Tab: the photos you upload are important because this is something you can control what people see about your business. As Floyd says, “Control the controllables.” Include a logo, a headshot, an exterior photo of your office, a recent listing, or any other pertinent photos that contribute to your brand as a realtor. You can use similar content that you would share to Facebook, LinkedIn or Instagram.
3. Posts Tab: this is where the “free marketing” comes into play. You can write and publish posts that will link to your Google Business. Include some business highlights, recent sales, testimonials, and photos. Posting here should be a no brainer. It’s free publicity. The posts do expire in 1-2 weeks so if you are going to be adding Google Posts to your content strategy, set a reminder to update it weekly for the best results.
4. Google Reviews: Google is another place to ask for reviews of your business. Now that you have your business claimed on Google, you can ask for them!
Create a link when asking your Clients for Google Reviews. Here's how:
-
Sign in to Google My Business.
-
If you have multiple locations, open the location you’d like to manage.
-
In the menu on the left, click Home.
-
In the “Get more reviews” card, you can copy the simplified URL Google creates to share with customers.
Have I convinced you to prioritize your Google My Business Account? If you have questions, please ask them in the comments below and I will answer them!
In summary:
1. Start by claiming your business or adding it to Google
2. Next, run through the different sections (tabs) in your account to update your business information.
3. Lastly, start incorporating Google Posts into your content strategy. If you are taking the time to post on Facebook and Instagram, you can take a few extra minutes to share something on Google.
Stay connected!
Join our list to receive the latest news, updates and discounts from our team.
Your information is safe with us.